Seed starting equipment.
Seems to me there is a run on seeds and seed starting equipment. I couldn’t find starting trays and while searching online I found most places that I found were already sold out or had jacked
I decided to go ahead and use starter trays this year and work towards figuring out misters for the greenhouse. Once I get that done I will build large waterproof trays and switch to soil blocks.
The stores may sell out of seeds, starter trays and even plants. They however can not sell out on what you can provide for yourself.
We should all strive for at least some level of self sufficiency. If we don’t grow as much of our own food as we can we are at the mercy of the markets and when people panic things can sell out really quickly.
I encourage you to get your seeds and figure out to start them as soon as you can, while it’s still a bit early for some it’s almost to late for some others.
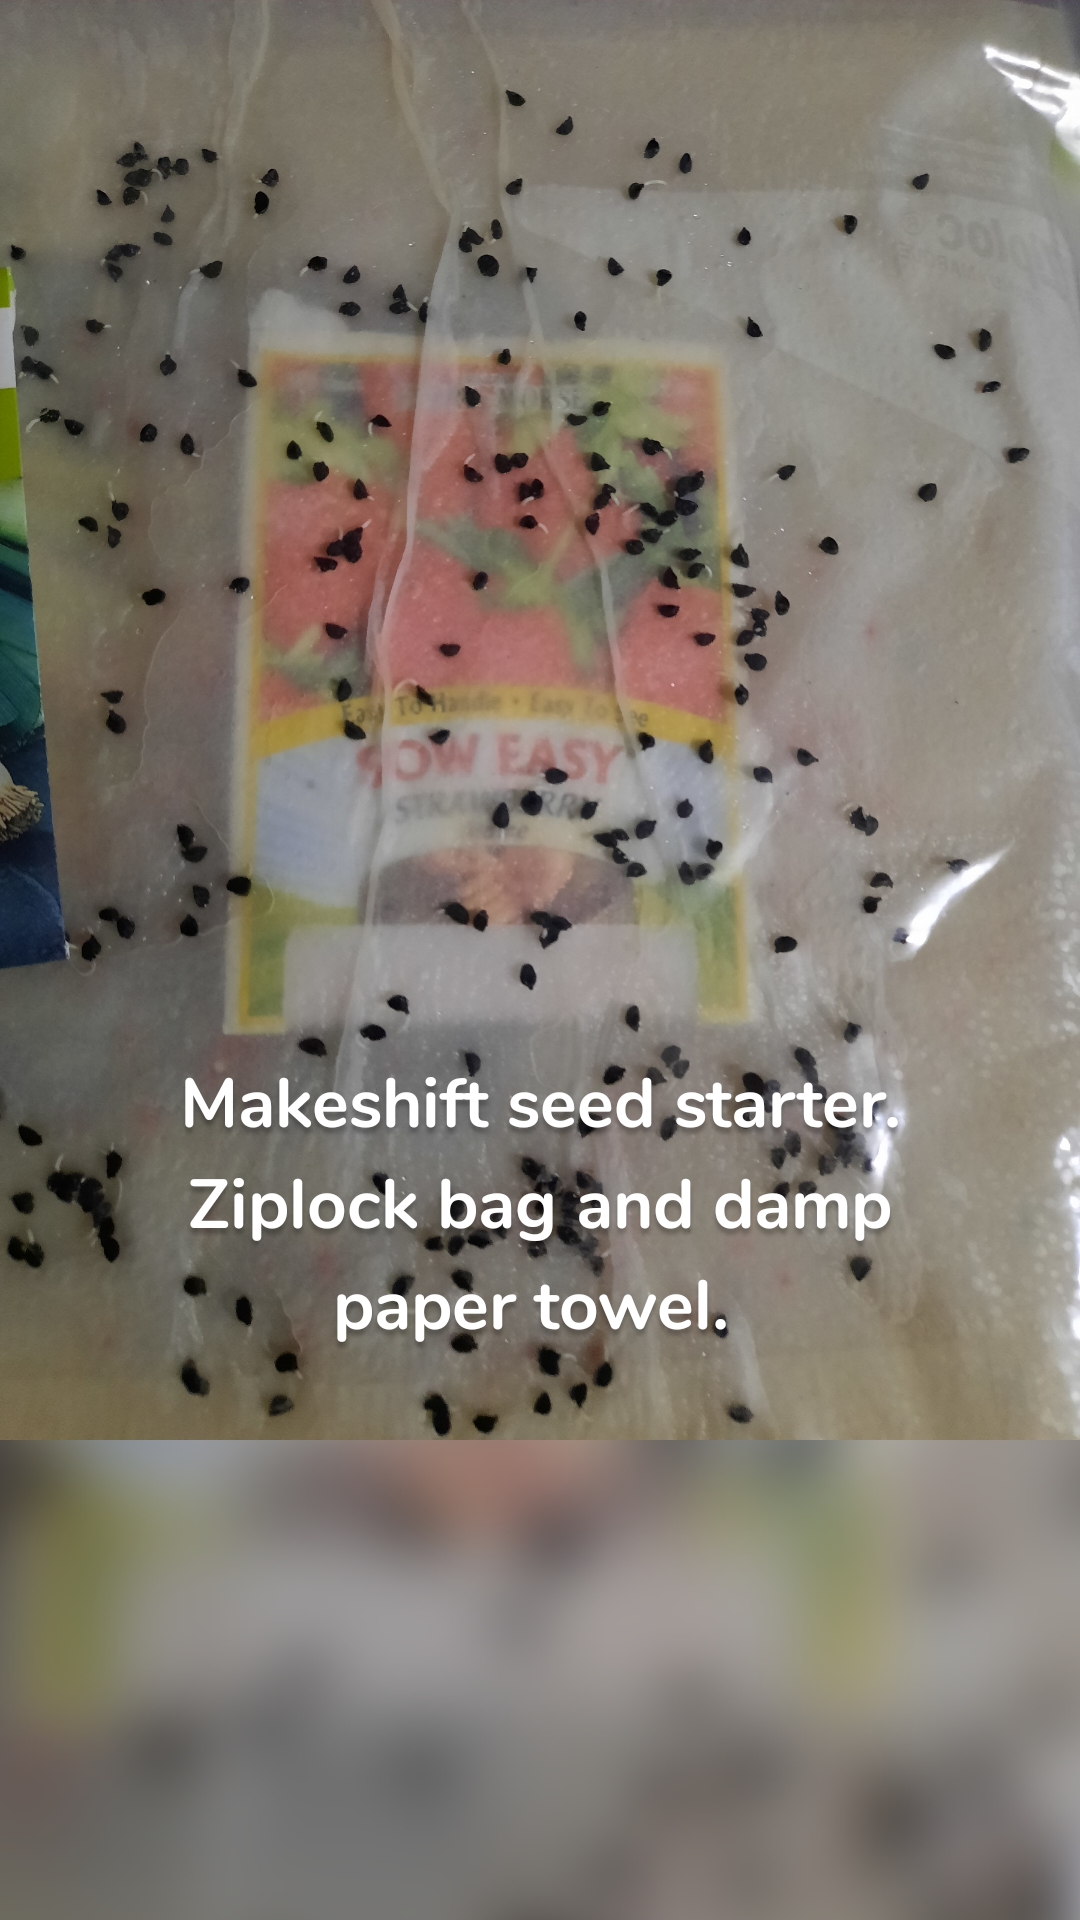
I got anxious and put my seeds that are supposed to take longer to germinate into zip lock bags with damp paper towels. Almost everything has already sprouted.
I finally found starter trays today, I started out grabbing 10 but ended up putting four of them back. I can find replacement refills for my starter trays and will likely order more tonight. I already had four that were recycled from last year.
Tomorrow I will be putting my seeds into the starter trays, I figure as the plants grow I can put them into soil block and start other seeds in my trays.
Best of luck and may your ventures be met with success!
Spring cleaning.
Spring will be here before we know it and then everyone will be hustling to clean up yards and prepare garden beds.
Will you be ready? For what it’s worth I did most of my yard work last fall, as soon as grasses and the weeds were dying out I mowed them up and deposited them in my compost bin.
I raked up all the leaves that fell in the street and thin strip in front of my house as soon as they fell. Had a huge pile too, totally over filled my large round wire compost bin. It’s four and a half foot tall and three foot in diameter.

I coverd it with a layer of cardboard weighted down with a car tire after watering it down well and wrapping with a couple of tarps.
It’s settled down about three forths of way and I’m curious to see just how much it has broken down, though I suspect it will take this year and maybe a bit longer to become usable compost.
There are equal amounts of woodvine, grass and leaves with generous layers of kitchen waste in between layers so I have high hopes. I’ll post pictures of the compost pile when I unwrap it for Spring time. Supposed to be warm this weekend so I will uncover the top and throw close to 20lbs of coffe grounds and paper pulp in and water down again.

I bought a cheap Walmart blender just for this.
I finally found a source for wood chips and so will cover pretty much the entire yard in a thick layer wood chips to lower my soil PH a little so I can hopefully grow blueberries someday.
I’ll cover everything with a layer of cardboard first to help choke out weeds, I’m also running an experiment in a small area where I grew cantaloupe last season.
I’m putting all most all of our paper waste through the blender and pouring in into a bucket, after the bucket if full I’m pouring it on the ground in about a two inch layer, whatever doesn’t get covered in the paper pulp will get cardboard before covering with the wood chips. I have bind weed.
This will be my attempt to combat the bind weed. I’ve tried chemicals, burning and digging. But it just keeps coming back. I even had it grow up through a 55 gallon drum that I was trying to grow potatoes in. I was surprised that it was able to do that.
I twisted the barrel enough to brake it off and pulled as much as I could out of the barrel. It didn’t come back so I know I can get rid of it if I don’t give up.
What are you working on?
Best of luck and may your ventures be met with success!
Air line pressure regulators.
Just a word of warning. If you deal with air compressors on or around the homestead or really anywhere else, just because you shut the air off or shut the regulator down it doesn’t mean there is no pressure left in the line.
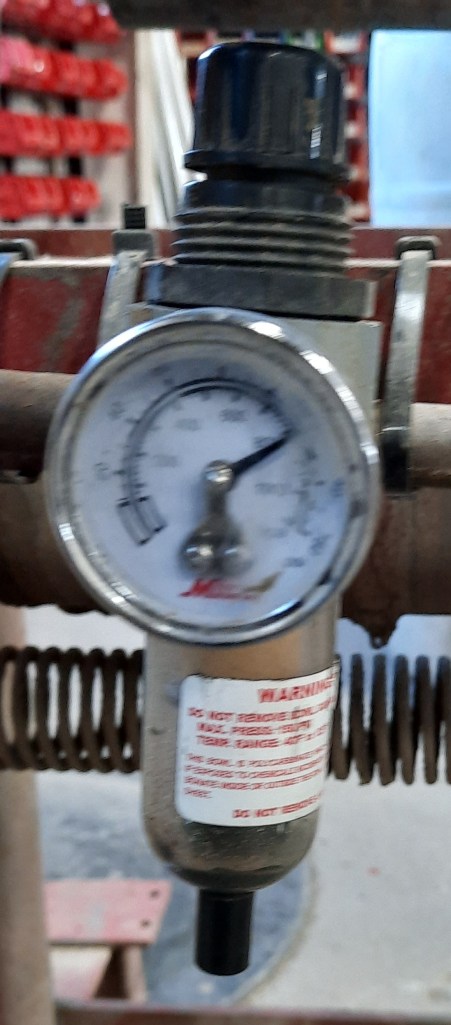
A lesson I was reminded of today. I couldn’t get the water to drain from this unit today, nothing I tried worked. I decided that the valve in the bottom of the bowl had stuck shut for whatever reason.
As I was unthreading the bowl I made a joke about it blowing up. Bear in mind it showed 0 air pressure, I’d even hooked up a blow gun on the out put and blew air through it until none came out.
As the last of the threads cleared the housing a blast of 175 psi main air line pressure shot out of the bowl area. How the bowl didn’t smash against the floor and shatter is beyond me.
The noise was deafening and eight hours later, my ears still hurt. Had the blast hit my bare skin it could have caused serious issues and there are so many other things that could have gone wrong. I wasn’t wearing safety glasses, there wasn’t supposed to have been any air so no danger.
Or so I thought. I had worked on other similar regulators that had no air flowing after having shut the pressure down. Luckily I was able to lock some vice grips on a rubber line to get the pressure shut down. I was then able to find the o-ring and get it put back together.
I feel really stupid but also really luck that no real damge or injuries occured. I’m not holding myself up as a saftey expert just sharing a very real incident that happened to me in hopes it won’t happen to someone else.
Thank you for taking the time to read this and may your ventures be met with sucess!
Banana tree.
Ok, I have to admit some of my posts are out in left field. This is one of them. Earlier today I stumbled across a video of someone growing a new plant from a green banana.
There are of course lots of phony videos out there and while this one could be, it seemed legit. While I may be wasting my time trying this, I’m doing it anyways.
I’m no where near a tropical location but the thought of growing a banana tree has always intrigued me and after watching the video I took the plunge, I figure worst case scenario it’ll end up in the compost.
If it works out, the boys and I will get to watch a plant grown that many have never seen up close. And who knows maybe someday we’ll get bananas from it.
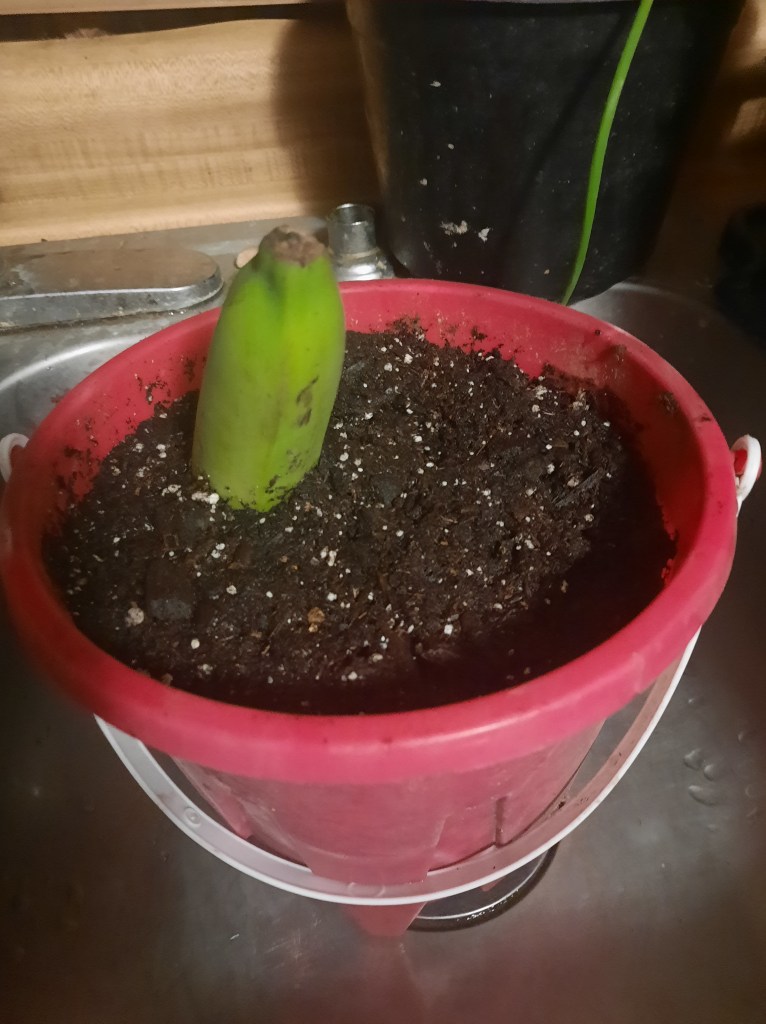
I have no idea what the liquid is that they soaked the stem end in. So I used what I have on hand, rooting hormone. Only time will tell.
Some will say this has nothing to do with homesteading but for me, it has everything to do with it. Sure it’s not practical but it is educational and so therefore worthwhile in my opinion. If you’ve done this I’d like to hear about your experience.
Below is a link to the video I watched.
After having tried this I have found it did not work for me, instead the banana rotted away. Not a total loss though. I stuffed the banana under the surface of the potting soil and planted a sprouted acorn in the pot.
Exactly why it didn’t work I do not know for sure though I wonder if it wasn’t irradiated. I’ll probably just buy a miniature banana tree at some point in time.
Huckleberry
Untill recently I hadn’t realized that huckleberries were an actual berry.
I just assumed it was the name of a cartoon character. Huckleberry Hound. Or perhaps Huckleberry Finn.. Lol
In any event it is an actual berry and from what I’ve read they are good eating. I of course do not know this personally just yet, though I have high hopes. I bought a packet of seeds from Bakers Creak. Packet said at least 35 seeds but there were well over 100.
After planting the seeds I did what I should have done before I bought the seeds, I stared researching them.
On the downside I read the berries are generally not readily available in stores. Apparently huckleberry plants do not like to be domesticated and prefer to grow wild.
Needles to say I’m not sure if I will have sucess with them or not but I will definitely be giving it a go, I feel they will make a great addition to the food forest that I am working on.
This is just one of the many plants that I’ll be trying to grow this year. I finally found a source for wood chips so this will play a big part in things to come.
I don’t have any pictures or firsthand experience but as soon as I do I will I will share what I have going on.
I believe everyone should try at least a couple of different plants every season.
Best of luck and may your ventures be met with sucess!
Another growing food from scraps post.
A short video showing how I am getting some food to regrow from scraps.
While I am quite serious about regrowing food from scraps and finding other way to secure food, I’m finding there may be a bit more of a learning curve than I first thought.
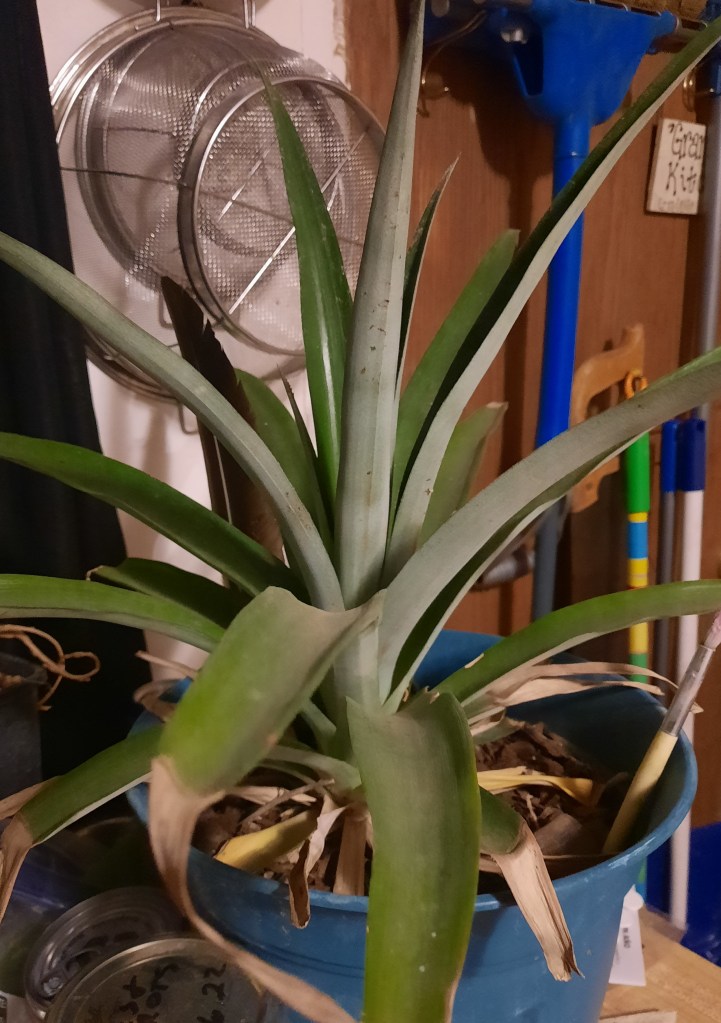
While I have a container with green onions that are doing rather well and a pineapple that is also growing great most everything else has not made it. The exception is an onion.
I decided to see how little of the onion I could cut off and still get it to at least try to regrow. I trimmed off the root taking just enough of the onion to keep it together.
It sat for what seemed like forever and looked to have died and dried up. I finally figured I may as well try another. But when I grabbed ahold of it, it barely moved.
There were roots growing and so I just covered up the exposed part. A few days later the greens broke through and it’s forming a new bulb.
I was so stoked I tried doing another the same way but it failed. I’m not sure what to make of the mixed results. In any event I recommend at least giving it a go.
If it works out you’ll be getting free food, if not it can still go into the compost pile.
Best of luck and may your ventures be met with success!
New seeds to try.
I had originally started this post last season but time got away from me and most of my seedlings were eaten by mice and much of the rest of them didn’t produce much of anything for us.
However this year I’ve already started some seeds and they look to be doing well so far. I still have some that have not sprouted yet and I’m not sure if it’s my experimental soil blocks or if the temperatures been a bit low for them.
Along with buying close to $100 in new seeds this season I also purchased a tool that measures PH, light, moisture and soil temperature. I have big aspirations for this season. Along with finally getting the greenhouse set up snd running and puttining in a massive raised bed garden area, I have gotten seeds for several plants that will come back every year pushing the food forest a bit closer to reality.

The above seed packets are what came in the mail today. I haven’t taken pictures of all the other seed packets yet but may. I have pretty much a full plastic grocery store bag full of seeds.
I also picked up a bag of seed starting mix just to see if it actually makes any difference in how many plants I end up with.
I suspect it won’t really affect the outcome but want to know for sure. I figure the more I learn and know first hand the better I can and will do. The desire to be able to put up a years worth of food at a time is driving me to learn and try things I may not have otherwise even considered.
When you need to start your seeds will depend greatly on where you live and there are plenty of resources available to help you figure it out if you need it.
Best of luck and may your ventures be met with success!
Eating acorns
Until my blog post the other day. I’d never considered eating acorns, I had thought about it many years ago but I was told they would make you sick if you ate them when I was young.
They have a lot of tannin in them that needs to be removed before you consume them. But otherwise they are good to eat.
There are a few waya to remove the tannin that I have read about and I’ll share those here. I willl also include links as this it new to me and probably to you too. Turns out acorns used to be a staple in people’s diets going way back. Seems we have lost lessons learned in the past.
Acorns as is can be toxic to people as well as some live stock, and have a bitter taste. So don’t just eat them as is.
To be honest, I haven’t eaten any yet though everything I read say they are really good. They can be used in place of walnuts etc. Since my knowledge is limited, I’ll provide a link to hopefully point you in the right direction.
Best of luck and may your ventures be met with sucess.
How much soil do you need?
If your building a raised bed or filling several larger containers to grow in you’ll need to figure out how much soil you will need.
Unless you already know how much soil to get or unless of course you’re using your own soil.then you can just shovel it in till you’re done.
If you’re buying it you’ll want at least a rough idea of how much you need so you don’t end up spending more than you really need to. Buying soil can be expensive.
There are ideas like Hügelkultur that would save money on soil and make for some good garden soil over time.
I recently picked up a fair sized plastic tote that I decided to turn into a planter however it would have cost me close to $40 to fill it with purchased soil. So I raked up leaves, twigs and even some weeds that I broke down and filled it to close to 3/4 of the way full. After that half of a good sized bag finished it off.
This is the same way I filled a larger container that I have grown a cherry tomato plant in two years in a row now. I get a lot of tomatoes on them and they have both gotten over six foot tall. After the season is over and the plants dries out I’ve broken them into little pieces and let them rot back into the soil.
Anyways, the main reason for this post is to help you figure out how much soil you will need, I kind of wandered there for a bit.
Math equation for figuring out how much soil you will need is simple: Length x Width x Height = Volume, then divide the number of cubic feet by 27. So one cubic yard = 27 cubic feet = 1,728 cubic inches.
Here’s an easier way:
