New seeds to try.

  I had originally started this post last season but time got away from me and most of my seedlings were eaten by mice and much of the rest of them didn’t produce much of anything for us.

  However this year I’ve already started some seeds and they look to be doing well so far. I still have some that have not sprouted yet and I’m not sure if it’s my experimental soil blocks or if the temperatures been a bit low for them.

  Along with buying close to $100 in new seeds this season I also purchased a tool that measures PH, light, moisture and soil temperature.  I have big aspirations for this season. Along with finally getting the greenhouse set up snd running and puttining in a massive raised bed garden area, I have gotten seeds for several plants that will come back every year pushing the food forest a bit closer to reality.

Seed packets

  The above seed packets are what came in the mail today. I haven’t taken pictures of all the other seed packets yet but may. I have pretty much a full plastic grocery store bag full of seeds.

I also picked up a bag of seed starting mix just to see if it actually makes any difference in how many plants I end up with.

I suspect it won’t really affect the outcome but want to know for sure. I figure the more I learn and know first hand the better I can and will do. The desire to be able to put up a years worth of food at a time is driving me to learn and try things I may not have otherwise even considered.

When you need to start your seeds will depend greatly on where you live and there are plenty of resources available to help you figure it out if you need it.

Best of luck and may your ventures be met with success!

Eating acorns

  Until my blog post the other day. I’d never considered eating acorns, I had thought about it many years ago but I was told they would make you sick if you ate them when I was young.

They have a lot of tannin in them that needs to be removed before you consume them. But otherwise they are good to eat.

There are a few waya to remove the tannin that I have read about and I’ll share those here. I willl also include links as this it new to me and probably to you too. Turns out acorns used to be a staple in people’s diets going way back. Seems we have lost lessons learned in the past.

Acorns as is can be toxic to people as well as some live stock, and have a bitter taste. So don’t just eat them as is.

To be honest, I haven’t eaten any yet though everything I read say they are really good. They can be used in place of walnuts etc. Since my knowledge is limited, I’ll provide a link to hopefully point you in the right direction.

https://www.woodlandtrust.org.uk/blog/2019/09/are-acorns-edible-and-other-acorn-facts/#:~:text=Raw%20acorns%20contain%20tannins%20which,made%20safe%20for%20human%20consumption.

Best of luck and may your ventures be met with sucess.

How much soil do you need?

If your building a raised bed or filling several larger containers to grow in you’ll need to figure out how much soil you will need.

Unless you already know how much soil to get or unless of course you’re using your own soil.then you can just shovel it in till you’re done.

If you’re buying it you’ll want at least a rough idea of how much you need so you don’t end up spending more than you really need to. Buying soil can be expensive.

There are ideas like Hügelkultur that would save money on soil and make for some good garden soil over time.

I recently picked up a fair sized plastic tote that I decided to turn into a planter however it would have cost me close to $40 to fill it with purchased soil. So I raked up leaves, twigs and even some weeds that I broke down and filled it to close to 3/4 of the way full. After that half of a good sized bag finished it off.

This is the same way I filled a larger container that I have grown a cherry tomato plant in two years in a row now. I get a lot of tomatoes on them and they have both gotten over six foot tall. After the season is over and the plants dries out I’ve broken them into little pieces and let them rot back into the soil.

Anyways, the main reason for this post is to help you figure out how much soil you will need, I kind of wandered there for a bit.

Math equation for figuring out how much soil you will need is simple: Length x Width x Height = Volume, then divide the number of cubic feet by 27. So one cubic yard = 27 cubic feet = 1,728 cubic inches.

Here’s an easier way:

https://www.gardeners.com/how-to/soil-calculator/7558.html

Watch “Heat riser for a solar pop can heater” on YouTube

I had plans of uploading the video directly so you wouldn’t have to follow a link. Sadly however the device I recorded it with bricked on me and I’m not paying youtube for the privilege of downloading my own video.

Anyways, this shows how I prepare cans to start making heat risers for pop can solar heaters. I’ll eventually put together another video showing how to put the cans together to form the risers themselves.

I’ll also likely put out a small reasonably priced booklet if there is enough interest in such a thing.

Best of luck in your ventures.

Composting.

I have posted before about my compost piles but I haven’t really said much about composting itself.

Personally I compost pretty much any and everything that will break down. Even many of the things that are not reccomend to be composted.

For meats and other things they say not to compost, I dig a hole a little deeper than needed to make sure they are at least 6″ or more below the surface. After I dump it in it is covered and then the rest of the compost pile is placed over the top of it.

I figure the the worms and bacteria will take care of it. By the time I’ll dig in that area again, it will be long gone. I should point out meats and other things they say to not compost can carry bacteria that could sicken you and or attract critters you wouldn’t want digging through your compost pile.

To be clear I’m not reccomending you do the same and if you do just be aware there are risks involved that may not work out so well for you. So research into it and know what you’re up against before even trying it.

As for normal composting I whole heartedly suggest you read up on it if you haven’t composted before and give it a go.

By composting you’ll not only eventually end up with great soil for growing plants in but you’ll also be keeping a valuable resource from going into the landfill and drawing worms and other beneficial critters. Though if things are going properly there will be critters you do not want.

Below are two links, one to composting and the last that explains the things that are good as well as bad and how to correct things. There are a lot of good videos out there as well as things things to read about composting.

Best of luck and may your ventures be met with sucess.

https://www.epa.gov/recycle/composting-home

https://newswire.caes.uga.edu/story/5120/compost-critters.html

Growing oak trees.

Last Fall the oldest boy picked up a fair amount of acorns. I figured I would try to start them come Spring.

Turns out they are not interested in waiting to grow.

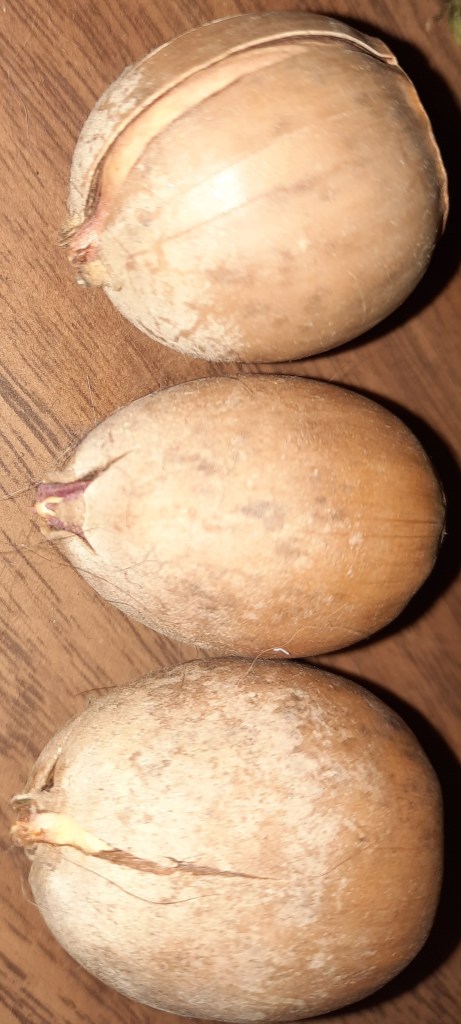
Acorns sprouting.

I’d put one in a soil block the other day. It hadn’t sprouted yet but the shell had split so I figured it at least had a chance of growing.

Today I just happened to notice roots starting to grow out of four of the acorns, most all of the rest have cracked their shells. The picture above was taken after I planted one of the ones that sprouted.

Below is one of the blocks I’m making for the acorns. I’ve decided it was time to try and get the rest to sprout.

Soil block with acorn inside. Blocker made from refried beans can with top and bottom cut out.

It would be nice if my blocks were a bit bigger, they are a nice 4″ in diameter but just a little over 3″ tall. 4″X 4″ would be better I belive. However I can find a shorter can and make a shorter block, wet the two and make the block taller.

Since I’ll be starting trees in these it seems the bigger the better. I have some 1 gallon pots that will be used to transplant the sprouts into after they get a little size to them.

I have read acorns will need to go through stratification first. However the ones that I have sprouting have not been exposed to cold and have been indoors the whole time..

However for the best chance of sucess it would be best to follow tried and true methods. Including stratification of acorns.

1. Collect ripened acorns as they drop in Fall.

2. Float test: put the acorns in a bowl of water, let sit for 24 hours. Discard the ones that float after that.

3. Put the acorns in a container/plastic bag with a damp paper towel or potting soil.

4. Check frequently for root growth.

5. Once the tap root forms the acorn can be put into a pot or other protected area after ( danger of freezing and frost are over) where it can grow for a year or two before being transplanted to it’s permanent spot.

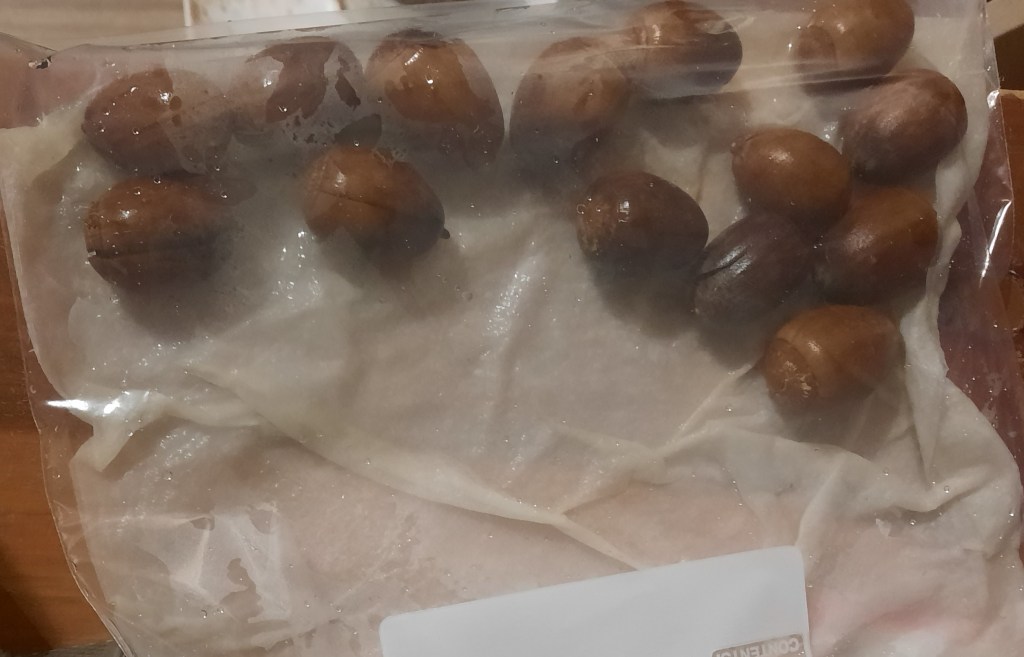
These are the acorns I’m trying to sprout now, several are showing roots. The ones in this zip lock bag were the ones that sank in the water immediately. The rest are still in the bowl, I’ll see how many are still floating tomorrow.

Acorns in 1 gallon zip lock bag with damp paper towel. Condensation shows at least some are transpiring

Three more sank and so were added into the bag. The rest were still floating, though one of them was sending out a root. Needless to say, I won’t be discarding it. I decided to experiment a little and removed the shells from a handfull of acorns, they all sank in the bowl of water. So even though it may be a waste of time, they will all be planted.

I’m also questioning the wisdom of just discarding acorns that don’t float. Since they are edible I’ll be looking into ways of preserving and storing acorns as food. If nothing else, so long as the nut isn’t bad it could be used in animal feed and if it’s bad composted.

Best of luck and may your ventures be met with sucess!

A raised bed for the micro homestead.

  I’ve been considering a raised bed for some time now. On one hand I really like the idea on the other I have hopes of moving to a larger place and hate the thought of building only to leave it behind.

  On the upside, so long as I don’t sell the property I could continue using it so I’m thinking I’ll go ahead and build it. I’d like to get a market garden set up as well as the food forest that is taking shape, though much slower that I would like.

  I have tin and some used 4X4’s that I’ll use to build the bed, and I have what remains of a huge tree that was cut down a little over two years ago or so and I also have a huge amount of tumble weeds that will be broken down and used for filler.

  My smaller compost pile will also likely be used to help fill the bed in. It was only started towards the end of fall but all of our compostables are being deposited in it, including shredded cardboard we used to throw away so the pile is growing rather quickly. I figure it will be at the bottom with the wood.

I’ll sink the 4X4’s 3′ into the ground after painting them to protect them from rotting. I’d considered setting them in concrete but seeing as only around 3′ will be above ground and screwed onto sheets of tin and weighted down with a great deal of soil I doubt it will be necessary. If my math is correct it will take around 26 thousand lbs of soil to fill the bed.

  As work progresses I’ll document it and share the results, I may even do some videos. That’s something I’d like to get better at. I have made a few now but feel I’m not very good at it which is why there are only a few so far.

I’m looking at 36″ tall X 4 foot wide and 20′ in length. So it will be considerably bigger than anything than anything I could afford to buy premade or have built for me.

If your considering building your own but not sure where to start the video link below may be of use to you.

https://youtu.be/QMk8Mo7pwWY

Best of luck and may your ventures be met with sucess!

Cordwood construction

While I am certainly no expert on the subject of building with cordwood, it is something that caught my attention some years ago. I believe I saw an article on the subject in Mother Earth.

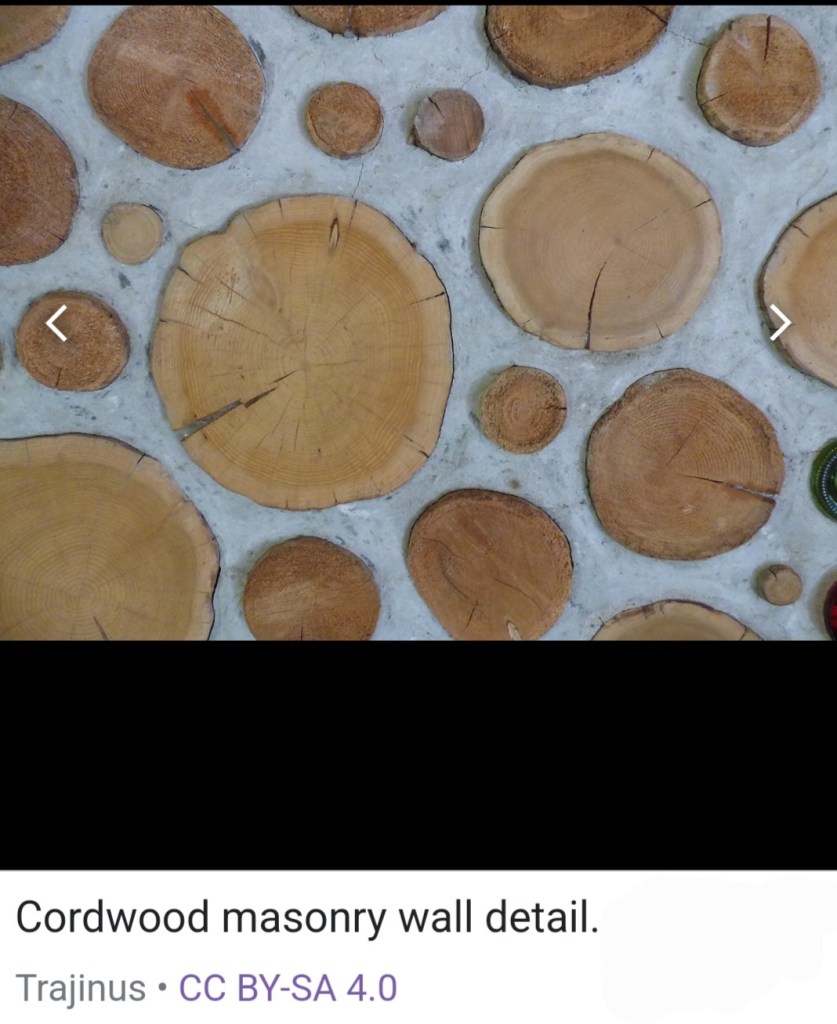
https://commons.wikimedia.org/wiki/File:Cordwood_masonry_wall.jpg#mw-jump-to-license

The above picture is not mine but is free to share as long as credit is given and a link to the license is provided. The link and credits are provided above.

I find the thought of cordwood construction very attractive. Mainly because most anyone can do it, not too mention it can be done relatively cheaply and at least where I live there seems to be a limitless supply of wood to work with. Assuming your willing to put forth the effort to aquire it.

From what I’ve read cordwood construction goes back around 1,000 years, or so.

As with anything there are pros and cons to cordwood construction. Below are some and there may well be others I’m unaware of.

Pros of Cordwood.
. You can use small pieces
.Added thermal mass
.Decent insulative properties
.Carbon sequestration

Cons of Cordwood:
.Movement of wood can cause cracks or crumbling
.End grain of wood exposed
.Labor intensive
.Expensive if you hire it done
.Lots of wood to morter interfaces

If your considering trying your hand at or just looking into building with cordwood there are books and videos to help you along. Sadly at this point in time, this is just an interest I have and I’m highly unqualified to take a deep dive into it on here. Though I have hopes of changing that sometime this Spring or Summer. I think I may revamp my oversized dog house and see how that goes.

Below is a link that may answer at least some of your questions. And of course if you have insight or experience in the matter, please feel free to comment.

https://www.greenhomebuilding.com/QandA/cordwood/seal.htm

Best of luck and may your ventures be met with success!