Walipini

  I’d said for years that I wanted one, then settled on a cheap hoophouse. The hoophouse is being ripped apart by the high winds we get here in kansas.

  So now I’ve started working on a walipini, finally almost 4′ deep. I forgot how hard it is on the back to dig a trench by hand.

  I’ll do a separate post on our progress. This is going to be rather long-winded as it is.

Underground Greenhouses: A Sustainable Solution.

Harnessing the Earth’s Natural Power
Underground greenhouses, a relatively new concept in agriculture, offer a sustainable and efficient way to grow crops. By utilizing the earth’s natural insulation properties, these structures can create a controlled environment that is ideal for plant growth, regardless of external weather conditions.
Key Benefits of Underground Greenhouses:

  • Temperature Regulation: The earth’s subsurface maintains a relatively stable temperature, providing a buffer against extreme heat and cold. This eliminates the need for excessive heating or cooling systems, reducing energy consumption.
  • Reduced Water Loss: Underground environments have higher humidity levels, which can help to minimize water evaporation. This is particularly beneficial in arid regions where water resources are scarce.
  • Pest and Disease Control: The controlled environment of an underground greenhouse can help to reduce the risk of pest infestations and diseases.
  • Protection from Extreme Weather: Underground greenhouses are less susceptible to damage from storms, hurricanes, and other natural disasters.
    Types of Underground Greenhouses:
  • Fully Subterranean: These greenhouses are completely buried beneath the ground, providing maximum insulation and protection.
  • Semi-Subterranean: These structures have a portion of their structure above ground, allowing for natural light to enter.
    Challenges and Considerations:
  • Construction Costs: Building an underground greenhouse can be more expensive than traditional above-ground structures due to the excavation and construction requirements.
  • Ventilation: Ensuring adequate ventilation is crucial to prevent the buildup of moisture and carbon dioxide.
  • Lighting: While underground greenhouses can benefit from natural light, artificial lighting may be necessary, especially during the winter months.
    Conclusion:
    Underground greenhouses represent a promising solution for sustainable agriculture. By leveraging the earth’s natural resources, these structures can provide a controlled environment for year-round crop production while reducing energy consumption and minimizing environmental impact. As technology continues to advance, we can expect to see even more innovative underground greenhouse designs emerging in the future.

A Closer Look at Underground Greenhouse Technology
Case Study: The Eden Project
One of the most well-known examples of an underground greenhouse is the Eden Project in Cornwall, England. This massive biodome complex features two enclosed environments: the Rainforest Biome and the Mediterranean Biome. Both structures are partially underground, allowing visitors to experience a variety of ecosystems under a single roof.
Innovative Technologies in Underground Greenhouses

  • Geothermal Heating and Cooling: Utilizing the earth’s natural heat to warm the greenhouse and cool it during the summer months.
  • Hydroponics and Aquaponics: Growing plants in nutrient-rich water solutions, reducing the need for soil and minimizing water waste.
  • Vertical Farming: Growing plants in stacked layers, maximizing space efficiency in underground environments.
  • LED Lighting: Providing efficient and customizable lighting solutions for optimal plant growth.
    Future Directions for Underground Greenhouses
    As technology continues to evolve, we can expect to see even more innovative underground greenhouse designs. Some potential future developments include:
  • Smart Greenhouses: Incorporating IoT (Internet of Things) technology to monitor and control environmental conditions in real-time.
  • Modular Design: Creating flexible underground greenhouse structures that can be easily expanded or modified.
  • Urban Agriculture: Utilizing underground spaces in cities to grow fresh produce locally.

  A Sustainable Agricultural Practice
Walipinis are a type of underground greenhouse commonly used in the Andean region of South America, particularly in Peru and Bolivia. They are a traditional agricultural practice that has been used for centuries to protect crops from harsh weather conditions and to extend the growing season.
Key Features of Walipinis:
* Underground Construction: Walipinis are typically built into hillsides or slopes, with the entrance at the bottom. This provides natural insulation from the elements.
* Ventilation System: A series of tunnels and shafts allow for air circulation and temperature regulation within the walipini.
* Natural Light: The entrance and sometimes skylights provide natural light for the plants.
* Diverse Crops: Walipinis can be used to grow a variety of crops, including potatoes, quinoa, and other Andean staples.
Benefits of Walipinis:
* Temperature Control: Walipinis provide a stable temperature environment, protecting crops from frost and extreme heat.
* Pest and Disease Protection: The controlled environment of a walipini can help to reduce the risk of pest infestations and diseases.
* Increased Productivity: By extending the growing season, walipinis can increase crop yields.
* Sustainability: Walipinis are a low-impact agricultural practice that can help to conserve natural resources.

Construction Techniques of Walipinis
Walipinis are typically constructed using local materials such as stone, adobe, and thatch. The process generally involves:
* Site Selection: A suitable hillside or slope is chosen, taking into account factors such as soil quality, drainage, and sunlight exposure.
* Excavation: A tunnel or series of tunnels is dug into the hillside, creating a subterranean space for the walipini.
* Wall Construction: The walls of the walipini are built using stone or adobe blocks, which are often mortared together using a clay-based mixture.
* Roof Construction: The roof is typically made of thatch or other natural materials, which provides insulation and helps to regulate the internal temperature.
* Ventilation System: A series of tunnels and shafts is created to allow for air circulation and temperature regulation.
The History of Walipinis
The exact origins of walipinis are unknown, but they are believed to have been developed by ancient Andean civilizations thousands of years ago. These early cultures would have relied on walipinis to survive in the harsh mountain environment, where temperatures can fluctuate greatly.
Over time, walipinis have evolved and adapted to the needs of local communities. Today, they remain an important part of the agricultural landscape in many parts of the Andes Mountains.

The Cultural Significance of Walipinis
Walipinis are more than just agricultural structures; they are deeply rooted in the cultural heritage of the Andean region. They represent a harmonious relationship between humans and the natural environment, as well as a testament to the ingenuity and resilience of ancient Andean civilizations.

  • Symbol of Community: The construction of a walipini often involves the collective effort of a community, strengthening social bonds and fostering a sense of shared purpose.
  • Connection to Ancestors: Walipinis are seen as a link to the past, connecting modern communities with their ancestors. Many indigenous groups believe that the spirits of their ancestors reside within the walipini, providing protection and guidance.
  • Spiritual Significance: In some Andean cultures, walipinis are associated with specific rituals and ceremonies. For example, they may be used as places of worship or as sites for agricultural offerings.
    Potential Applications of Walipinis in Modern Agriculture
    While walipinis are primarily associated with traditional agriculture, they have the potential to be adapted for use in modern farming practices. Some potential applications include:
  • Climate Change Adaptation: Walipinis can provide a buffer against extreme weather events, such as droughts and heatwaves. They can also help to reduce the impact of climate change on agricultural productivity.
  • Organic Farming: Walipinis can be used to grow organic crops, as they offer a natural and pest-resistant environment.
  • Permaculture: Walipinis can be incorporated into permaculture systems, which aim to create sustainable and self-sufficient food production systems.

Walipinis and Permaculture:

  A Natural Fit
Permaculture is a design system that mimics natural ecosystems to create sustainable and productive systems for food production, housing, and energy. Walipinis, with their underground construction and focus on natural processes, align well with permaculture principles.
Key Permaculture Principles and How Walipinis Align:
* Observe and Interact: Walipinis demonstrate a deep understanding and respect for the local environment, adapting to the specific conditions of the Andean region.
* Catch and Store Energy: The underground construction of walipinis helps to capture and store solar energy, providing a stable temperature for plant growth.
* Obtain Yield: Walipinis provide a consistent yield of crops, even in harsh weather conditions.
* Self-Regulation: Walipinis are designed to be self-regulating systems, with natural ventilation and temperature control mechanisms.
* Use Edges and Corners: The unique shape and design of walipinis create a variety of microclimates, allowing for the cultivation of a diverse range of crops.
Permaculture Design Elements in Walipinis:
* Guilds: Walipinis can be used to create plant guilds, where different species work together to benefit each other. For example, companion planting can be used to attract beneficial insects and deter pests.
* Water Management: Walipinis often incorporate water management features, such as rainwater harvesting and irrigation systems, to maximize water efficiency.
* Soil Health: Walipinis can be used to improve soil health through techniques such as composting and cover cropping.
In conclusion, walipinis are a valuable tool for permaculture practitioners, offering a sustainable and resilient approach to agriculture. By understanding the principles and practices of permaculture, we can further optimize the design and use of walipinis to create more productive and sustainable food systems.
How to Grow Your Own Garlic

  Garlic is a versatile bulb that adds flavor and health benefits to countless dishes.

  Growing your own garlic is a rewarding experience, and it’s easier than you might think.

  Here’s a guide to get you started:

  Choosing the Right Garlic
* Hardneck vs. Softneck: Hardneck varieties produce larger bulbs with a stronger flavor, while softneck varieties are known for their smaller, milder bulbs and the ability to produce scapes (flower stalks).

* Climate: Consider your local climate. Hardneck varieties are better suited for colder regions, while softneck varieties can thrive in warmer climates.
Planting Garlic

* When to plant: Garlic is typically planted in the fall, a few weeks before the first frost.
* Soil preparation: Choose a well-draining, sunny location. Amend the soil with compost or aged manure to improve fertility.
* Planting depth: Plant garlic cloves about 2 inches deep, with the pointed end facing upward.
* Spacing: Space cloves about 6 inches apart.
Caring for Garlic
* Watering: Water regularly, especially during dry periods. Avoid overwatering, as this can lead to rot.
* Mulching: Mulching around the garlic plants can help retain moisture and suppress weeds.
* Fertilizing: Garlic doesn’t typically require additional fertilizer if you’ve amended the soil before planting.
Harvesting Garlic
* When to harvest: Garlic is ready to harvest when the leaves turn brown and dry.
* Harvesting: Gently dig up the garlic bulbs and allow them to cure in a dry, well-ventilated area for a few weeks.
Storing Garlic
* Storing: After curing, store garlic in a cool, dry place. Braiding garlic can also help prolong its shelf life.
By following these steps, you can enjoy a bountiful harvest of homegrown garlic.

  Experiment with different varieties to find your favorites and discover the joy of growing your own food.

Additional Tips for Growing Garlic
Pest and Disease Control:

  • Nematodes: These microscopic worms can damage garlic bulbs. Consider rotating your crops to avoid nematode infestations.
  • Rust: This fungal disease can cause yellow spots on leaves. Choose resistant varieties and practice good garden hygiene.
  • Thrips: These tiny insects can cause leaf damage. Monitor your plants for signs of thrips and take action if necessary.
    Growing Garlic in Containers:
  • Container size: Use containers that are at least 12 inches deep to accommodate the garlic bulbs.
  • Soil: Fill the containers with a well-draining potting mix.
  • Planting and care: Follow the same planting and care guidelines as for garden-grown garlic.
    Using Garlic Scapes:
  • Harvesting: Scapes are the flower stalks that grow from garlic plants. Harvest them when they are about 6-8 inches long.
  • Cooking: Garlic scapes can be used in stir-fries, soups, and pesto. They have a milder flavor than garlic bulbs.
    Experimenting with Garlic Varieties:
  • Variety trials: Try growing different garlic varieties to find your favorites. Consider factors such as flavor, size, and disease resistance.
  • ** heirloom varieties:** Heirloom garlic varieties often have unique flavors and characteristics.
    By incorporating these additional tips, you can further enhance your garlic-growing experience and enjoy a delicious, homegrown harvest.

Rosemary

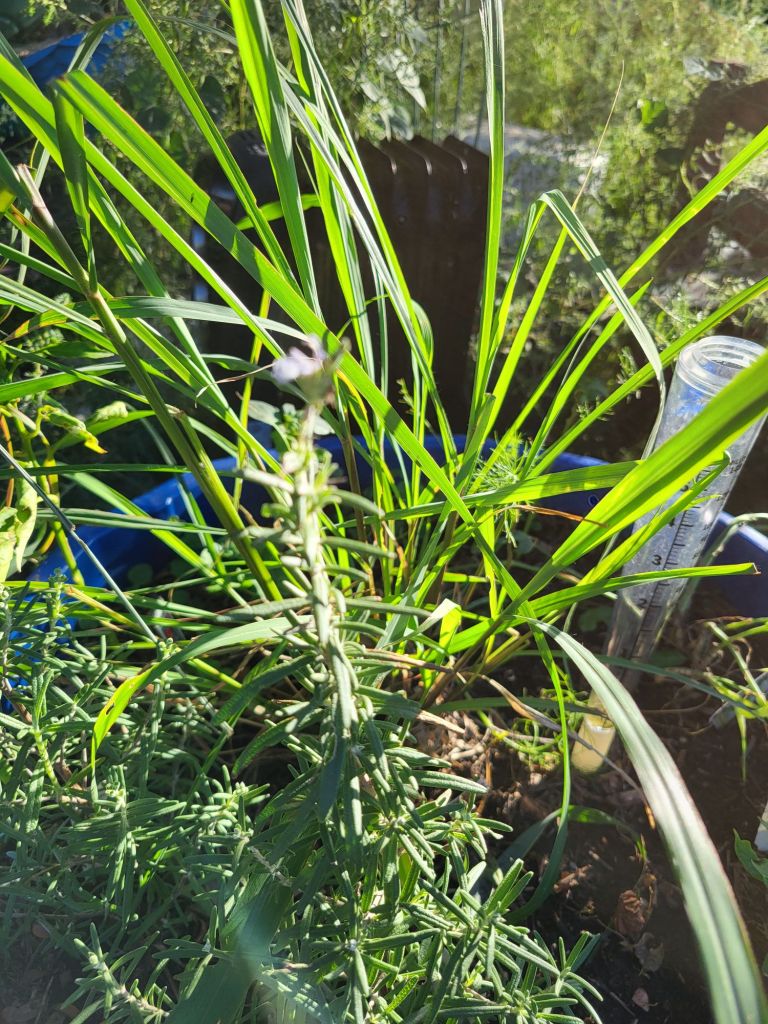
  Our Rosemary recently put on blooms. This is the second year of growing it, the first year’s plants died out. I’m hopeful we can keep it going, especially if it sets seed.

Rosemary in bloom.

  A Fragrant Herb for Your Garden and Kitchen

  Rosemary (Rosmarinus officinalis) is a versatile herb that adds flavor, aroma, and beauty to gardens and kitchens alike. Its evergreen leaves, which are often used in cooking, have a strong, pine-like scent and a slightly bitter taste.

  Growing Rosemary
Rosemary is a hardy plant that thrives in warm, sunny climates. It is drought-tolerant and can be grown in pots or directly in the ground. Here are some tips for growing rosemary:

  • Sunlight: Rosemary needs at least six hours of direct sunlight per day.
  • Soil: Well-draining soil is essential for rosemary. Avoid planting it in areas with poor drainage.
  • Watering: Rosemary is drought-tolerant, but it still needs regular watering, especially during hot, dry weather. Allow the soil to dry out slightly between waterings.
  • Fertilizing: Rosemary does not require heavy fertilization. A light application of a balanced fertilizer in the spring is sufficient.
  • Pruning: Pruning rosemary helps to maintain its shape and encourage growth. Trim back the tips of the branches to promote branching.
  • Propagation: Rosemary can be propagated from cuttings or seeds. Cuttings are the easiest method and usually take root quickly.
  • Using Rosemary in Cooking
  • Rosemary is a versatile herb that can be used in a variety of dishes. Here are some ideas:
  • Poultry and meat: Rosemary pairs well with chicken, lamb, pork, and beef. Add sprigs of rosemary to roasts, kebabs, and marinades.
  • Fish: Rosemary can also be used to flavor fish. Try adding sprigs of rosemary to grilled or baked fish.
  • Vegetables: Rosemary can be used to add flavor to roasted or grilled vegetables, such as potatoes, carrots, and squash.
  • Soups and stews: Add a sprig of rosemary to your favorite soups and stews for a boost of flavor.
  • Bread and pastries: Rosemary can be used to flavor bread, biscuits, and scones.
  • Infused oils and vinegars: Rosemary can be infused into olive oil or vinegar for a flavorful condiment.
    Other Uses for Rosemary
    In addition to its culinary uses, rosemary has a number of other benefits:
  • Aromatherapy: Rosemary is often used in aromatherapy to improve memory, concentration, and mood.
  • Hair care: Rosemary can be used as a hair rinse to promote hair growth and prevent dandruff.
  • Insect repellent: Rosemary can repel insects such as mosquitoes and flies.
    Whether you’re a seasoned gardener or just starting out, rosemary is a wonderful herb to grow. Its fragrant leaves can add flavor to your meals and beauty to your garden.

A little help if you can.

This will be one of my shortest blog posts ever.

  I’m not happy to be asking anyone for help, but desperate times call for desperate measures.

  So, long story short, someone very special to me has been wronged and must take a stand and fight or potentially lose her career.

  As we all know, nurses put up with far more than most and generally do it with a smile.

  If you can, please help me return her smile. Even just sharing this will mean more than you know!

https://gofund.me/cf7acf25

A new computer.

  Do you have to have a computer to live on a homestead or farm?

  Absolutely not. They are handy to have, though. My old laptops still get done what I need them to do, but I wanted a desktop computer for blogging, writing, and everything for selling things.

  The one I bought is more new to me than new, so I saved a good deal of money, it’s been remanufactured, and supposedly has a decent warranty.

  Ironically, it arrived today while I was at work. I was stoked as I unboxed. I noticed that the mouse was generic and sticks a bit. The keyboard was a Lenovo. The monitor and display are HP.

  Mouse finally freed up, but the keyboard buttons stick, and it will not even turn on. Upon moving it, I can hear broken parts rattle around inside, and one of the feet on the back is missing. Oh well, I guess.

  I’ve spent the last four hours getting another keyboard to work and doing updates. Personally, I’m over buying used used computers from people I don’t know personally.

  I think it will work for what I need so I’ll call it good for now. If you can swing it, I’d suggest getting a new one. If not, hopefully, you can find a known good one.

  Computer Use on a Homestead: More Than Just Checking Emails
In today’s digital age, even those living off the grid can benefit from the power of technology. Computers, in particular, can be invaluable tools for homesteaders, providing essential information, resources, and connectivity.
Essential Homesteading Tools

  • Research and Information: The internet is a vast repository of knowledge, from gardening tips to livestock care. Homesteaders can access countless articles, forums, and videos to learn new skills and solve problems.
  • Communication: Computers facilitate easy communication with other homesteaders, suppliers, and local communities. Email, social media, and online forums allow for sharing experiences, seeking advice, and building relationships.
  • Education: Online courses and tutorials offer a convenient way to learn new homesteading skills, from blacksmithing to beekeeping.
  • Business: For homesteaders who sell their products, computers are essential for managing orders, bookkeeping, and marketing. Online platforms can help reach a wider customer base and streamline business operations.
  • Entertainment: After a long day of work, homesteaders can relax and unwind with movies, music, or games on their computers.
    Tips for Homesteading Computer Use
  • Choose a Reliable Internet Connection: A stable internet connection is crucial for accessing online resources and staying connected. Consider options like satellite internet, cellular data, or even building your own Wi-Fi network using a mesh network.
  • Invest in a Durable Computer: Look for a rugged and reliable computer that can withstand the harsh conditions of a homestead. Consider factors like durability, battery life, and storage capacity.
  • Backup Your Data: Accidents happen, so it’s important to regularly back up your important files and data. Use cloud storage or external hard drives to ensure your information is safe.
  • Limit Screen Time: While computers are valuable tools, it’s essential to balance technology with the natural world. Spend time outdoors, enjoying the beauty of your homestead and disconnecting from screens.
    By utilizing computers effectively, homesteaders can enhance their lives, improve their skills, and connect with a wider community. With the right tools and approach, technology can be a valuable asset for any homestead.

Back to real butter for us!

Our new butter dish.

  My honey likes bees 🐝 so I like finding things with bees on them.

    For years now, I just bought whichever spread was the cheapest, to be honest.

  I’d forgotten the taste of butter but recently decided to give it a try, I was a little put off by the price and nearly passed it by again but thought better of it.

  I’m glad I did, while I’m not currently able to make our own butter I do plan on doing so, I loved it when I was a kid working the summer at the ranch my uncle Frank Speers ran. Aunt Jennie would always have hot, fresh homemade meals ready for us when we woke up and got ready to head out to work.

  And then again, as the sun set and we came in from working. I sure miss those days. I made $15 a day, but I always had money.

  Anyway, getting sidetracked, taking a trip down memory lane.

  Needless to say, the Butter I bought, Land O Lakes was , is amazing. Until we can make our own, this is what we will be using.

  The Butter Debate: Real vs. Fake
Is Butter Bad for You?

  It’s a question that’s been swirling around for decades: is real butter a health hazard or a dietary gem?

  While low-fat margarine and other substitutes have long been touted as healthier alternatives, recent research suggests that butter may not be the villain it once seemed.

  The Case for Butter


* Nutrient-Dense: Real butter is packed with vitamins and minerals, including vitamins A, D, and E, as well as beta-carotene. These nutrients are essential for good vision, immune function, and overall health.
* Conjugated Linoleic Acid (CLA): Butter is a natural source of CLA, a fatty acid linked to various health benefits, such as weight management and reduced body fat.
* Better Flavor and Texture: Real butter adds a rich, creamy flavor and texture to foods that simply can’t be replicated by artificial substitutes.

  The Problem with Substitutes
* Trans Fats: Many margarine and other butter substitutes contain trans fats, which have been linked to heart disease, stroke, and other health problems.
* Artificial Ingredients: These products often contain artificial flavors, colors, and preservatives that can be harmful to your health.
* Nutrient Deficient: Substitutes typically lack the essential nutrients found in real butter, such as vitamins and minerals.
Choosing the Right Butter
While real butter is generally healthier than its artificial counterparts, it’s important to choose wisely. Look for butter made from grass-fed cows, as it tends to be higher in CLA and omega-3 fatty acids. Also, be mindful of portion sizes, as butter is high in calories and saturated fat.

  In Conclusion
While moderation is key, real butter can be a nutritious and delicious addition to your diet. By choosing high-quality butter and enjoying it in moderation, you can reap the benefits without sacrificing your health.

Cricut

  This could be a really long, drawn-out post, but for the sake of saving some sanity, I’ll try to keep it short.

  Some time back, I became interested in being able to make replacement stickers for some of the old lawnmowers I’ve been working on to resale. 

  It dawned on me that a Cricut or something similar might work, having seen some of the things made on them, so I started looking into it.

  I picked up one machine, a Cameo only to find it was old enough that I couldn’t register it. I proceeded to buy a much  newer model Cricut Explore Air 2.

  I figured it would be a great starter machine. This was on eBay and at a fair price for what was described in the auction. Yesterday was the big day, I was going to get all set up and start ordering whatever else I would need to get started. I already ordered a new computer just to use for it and for my blogging and writing efforts.

  Sadly, as I unboxed it, I came to realize that what I was shipped was the first model of the explore air put out. And it doesn’t have the automatic support for 13 tools like the model I was supposed to have received.

  I, of course, contacted the seller and informed them that I’d received the wrong machine, assuming they likely had several auctions, my email was responded to with I’m sorry, I thought it was the air 2.

  No offer to correct or refund, just an “I’m sorry.”  Unfortunately, this machine simply won’t do all the things I want to do, and of course, the auction states returns not accepted, so I guess we’ll see how that goes.

  I’m making one more attempt at a used one on eBay. If it doesn’t pan out, I guess I’ll bite the bullet and order a new one. I kind of hate to since this is more or less just to see if I can figure out how to make some stickers and a few other things that I think will be able to be sold to bring in another income stream.

  I’ll do an update sooner or later when I get this figured out.

  Am I the only one who wastes time thinking I can get ahead of the game and save a little money at the same time?

  Any thoughts or advice would be greatly appreciated.

Huguelkulture

  A Sustainable and Productive Gardening Method to be sure.

  It’s also the way I am filling all of my raised beds and 25 gallon containers.

  I can’t even begin to calculate how much money it has saved me since I started using this method, and much of it is things that I wouldn’t generally want to put into my compost. I want things in my compost to break down as quickly as possible and hopefully not attract pests.

  The items I put into the bottoms of my containers and raised beds aren’t as important material or time wise. If a chunk of wood takes years to decompose, it simply won’t matter, or if it’s a larger chunk of meat or cheese, it won’t get dug up and the microbes have a long time to decompose it. It will help hold in moisture as long as it’s there, adds nutrients for plant roots, and the microorganisms that live in the soil as well as the worms. All in all, it’s a win-win scenario.

  I can and do put in weeds that I chop or mow down, grass clippings, leaves whatever spoils in the fridge, old bones, etc. Also, all the yard waste each spring and fall can go into them. While the vast majority of all our organic waste goes into the compost, a good chunk of it is diverted to fill our raised beds and containers as spring approaches.

  Buying good soil can get expensive quite quickly. If you have the funds and don’t mind spending the money to fill your raised beds, then more power to you.

  Personally, I’m gearing up for retirement, so I’m trying to build up my portfolio while saving back as much cash as possible. And I have a strong gut feeling that prices for food and fuel are going to continue to rise, leaving us all a little worse off. Saving and recycling things that might otherwise become cast offs only seem to make sense to me. But that’s a topic for another day, I think.

  Huguelkulture is a gardening technique originating in Europe. It has gained popularity worldwide due to its sustainability and productivity.

  This method involves creating raised beds using a combination of organic materials, such as wood chips, leaves, and compost. By harnessing the power of natural processes, huguelkulture provides a nutrient-rich environment for plants to thrive.

  Huguelkulture, pronounced “hoo-gel-kul-toor,” is a French term meaning “mound culture.” It involves building raised beds using a layered system of organic materials.

  The bottom layers consist of coarser materials like wood chips or branches, while the top layers are made up of finer materials like leaves, compost, and soil.

  Over time, these materials decompose, releasing nutrients into the soil and creating a fertile environment for plants.

  Benefits of Huguelkulture
* Improved Soil Health: Huguelkulture helps to improve soil structure, increase water retention, and enhance nutrient availability.
* Increased Productivity: Plants grown in huguelkulture beds often yield higher yields and have better flavor.
* Reduced Weed Pressure: The raised beds create a barrier between the soil and surrounding weeds, minimizing weed growth.
* Pest and Disease Control: Huguelkulture can attract beneficial insects that help control pests and diseases.
* Sustainability: By using organic materials and reducing the need for chemical inputs, huguelkulture promotes sustainable gardening practices.
How to Create a Huguelkulture Bed
* Choose a Location: Select a sunny area with well-draining soil.
* Gather Materials: Collect organic materials such as wood chips, leaves, branches, compost, and topsoil.
* Build the Base: Create a base for the huguelkulture bed using large pieces of wood or rocks. I personally lay down two layers of cardboard to make sure weeds or grassroots don’t try to come up from the bottom. If kept moist, it breaks down fairly quickly.
* Add Layers: Layer the organic materials, starting with coarser materials at the bottom and gradually adding finer materials towards the top.
* Top with Soil: Cover the organic layers with a thin layer of topsoil.
* Plant: Plant your desired vegetables, herbs, or flowers in the huguelkulture bed.
Maintaining a Huguelkulture Bed
* Watering: Water the huguelkulture bed regularly, especially during dry periods.
* Mulching: Mulch around the base of the plants to help retain moisture and suppress weeds.
* Fertilizing: While huguelkulture beds naturally provide nutrients, you may need to add additional compost or fertilizer as needed.
* Pruning: Prune plants as necessary to maintain their shape and encourage growth. I drop what I Clio off on the soil at the plants base unless of course I want them for starts for more plants.


Conclusion
Huguelkulture is a sustainable and productive gardening method that offers numerous benefits. By creating nutrient-rich soil and promoting biodiversity, huguelkulture can help you grow healthy and delicious crops. If you’re looking for a more natural and sustainable way to garden, consider trying huguelkulture.

Keywords: huguelkulture, sustainable gardening, raised beds, organic gardening, soil health, productivity, pest control, weed control, gardening tips.

Gogi berries


  Gogi berries, also known as wolfberries, have been hailed as a nutritional powerhouse for centuries.

  Native to China, these bright red berries have gained immense popularity worldwide due to their impressive health benefits.

  Packed with antioxidants, vitamins, and minerals, gogi berries offer a natural way to boost your overall well-being.

  What are Gogi Berries?
Gogi berries (Lycium barbarum) are small, oval-shaped berries that grow on shrubs. They have a slightly sweet and tart taste, often compared to cranberries. These berries have been used in traditional Chinese medicine for centuries to treat various ailments.

  Nutritional Profile.  
Gogi berries are a nutritional treasure trove. They are rich in:

  • Vitamins: Vitamins A, B1, B2, B6, C, and E
  • Minerals: Iron, zinc, copper, and selenium
  • Antioxidants: Anthocyanins, beta-carotene, and zeaxanthin
  • Amino acids: Essential amino acids necessary for protein synthesis
    Health Benefits
    Gogi berries offer a wide range of health benefits, including:
  • Boosting Immunity: The high antioxidant content in gogi berries helps strengthen the immune system, protecting against diseases and infections.
  • Improving Eye Health: The antioxidants zeaxanthin and lutein in gogi berries can help protect the eyes from age-related macular degeneration and cataracts.
  • Supporting Heart Health: Gogi berries may help lower blood pressure and cholesterol levels, reducing the risk of heart disease.
  • Aiding Weight Management: The fiber content in gogi berries can help promote satiety and regulate digestion, making them a great addition to a balanced diet.
  • Enhancing Brain Function: The antioxidants in gogi berries may help protect the brain from oxidative stress, which can contribute to cognitive decline.
  • Balancing Blood Sugar Levels: Gogi berries may help regulate blood sugar levels, making them beneficial for people with diabetes.
    How to Incorporate Gogi Berries into Your Diet
    There are many ways to enjoy gogi berries. Here are some ideas:
  • Eat them raw: Gogi berries can be eaten on their own as a healthy snack.
  • Add them to smoothies: Blend gogi berries with your favorite fruits and vegetables for a nutritious and delicious smoothie.
  • Sprinkle them on yogurt or oatmeal: Add a burst of flavor and nutrition to your breakfast.
  • Use them in baking: Gogi berries can be added to muffins, cookies, and other baked goods.
  • Make gogi berry tea: Steep dried gogi berries in hot water to make a refreshing and healthy tea.
    Gogi berries are a versatile and nutritious food that can offer numerous health benefits.
  •   Whether you’re looking to boost your immunity, improve your eye health, or support your overall well-being, incorporating gogi berries into your diet is a great choice.

  • Keywords: gogi berries, wolfberries, health benefits, antioxidants, vitamins, minerals, nutrition, immune system, eye health, heart health, weight management, brain function, blood sugar, diet.

Growing Gogi Berries:

  A Guide to Cultivating Nature’s Powerhouse

  Gogi berries, known for their nutritional benefits and vibrant color, are becoming increasingly popular. If you’re looking to grow your own supply of these superfruits, this guide will provide you with valuable information on planting, caring for, and harvesting gogi berries.

  Choosing the Right Location
Gogi berries thrive in warm, sunny climates. They require at least 6-8 hours of direct sunlight per day. Well-draining soil is essential to prevent root rot. Consider planting them near a south-facing wall or fence for added warmth.

  Planting Gogi Berries
* Timing: The best time to plant gogi berries is in the spring after the last frost.
* Spacing: Plant gogi berry bushes 6-8 feet apart to allow for adequate airflow and sunlight.
* Soil Preparation: Amend the soil with organic matter to improve drainage and fertility. Dig a hole slightly larger than the root ball and gently place the rootball inside. Fill in the surrounding soil and water thoroughly.

  Caring for Gogi Berries
* Watering: Gogi berries prefer consistent moisture, but avoid overwatering. Check the soil regularly and water deeply when the top inch is dry.
* Fertilizing: Fertilize gogi berries in early spring with a balanced fertilizer. Avoid over-fertilization, as it can lead to excessive growth and reduce fruit production.
* Pruning: Pruning is essential for maintaining a healthy and productive gogi berry plant. Remove dead or damaged branches in the spring. To encourage fruiting, prune back vigorous growth after the harvest season.
Harvesting Gogi Berries
Gogi berries typically ripen in late summer or early fall. The berries will turn bright red when they are ripe. Gently harvest the berries by pulling them away from the stems. Store them in the refrigerator for up to a week or freeze them for longer storage.

  Tips for Successful Gogi Berry Growing
* Pest and Disease Control: Monitor your gogi berry plants for pests and diseases. Common pests include aphids, spider mites, and leafhoppers. If necessary, use organic pest control methods.
* Pollination: Gogi berries are self-pollinating, but cross-pollination can improve fruit set. Consider planting multiple varieties close together.
* Winter Protection: In colder climates, protect your gogi berry plants from harsh winters by mulching around the base or providing a protective cover.
By following these guidelines, you can successfully grow your own gogi berries and enjoy the health benefits of this nutritious superfruit.

Gogi berries.

  For more information,  click the link below. It will take to another page that is not mine but has good information.

https://www.healthline.com/nutrition/goji-berry?hl=en-US

Keywords: gogi berries, growing gogi berries, planting gogi berries, caring for gogi berries, harvesting gogi berries, superfruit, gardening, nutrition.

Gooseberries.

Gooseberries: A Tart and Tangy Treat

  I was just gifted some Gooseberry plants by my friend Devon. A welcome addition to our food forest attempt.

  Gooseberries are a small, tart berry with a slightly acidic flavor. They are often used in jams, jellies, and pies but can also be eaten fresh or used in cocktails. If you’re looking for a unique and flavorful addition to your garden, consider growing gooseberries.

  Growing Gooseberries
Gooseberries prefer cool climates with plenty of sunlight.

  They are hardy plants that can tolerate most soil types but prefer well-drained soil. Here are some tips for growing gooseberries:

  • Planting: Plant gooseberries in the spring or fall. Space plants about 6-8 feet apart.
  • Pruning: Gooseberries require regular pruning to maintain a healthy and productive plant. Prune immediately after harvest to remove old and unproductive wood.
  • Pollination: Gooseberries are self-pollinating, but planting multiple varieties can increase yields.
  • Harvesting: Gooseberries are typically ready to harvest in late spring or early summer. They are ripe when they are a deep red or purple color.
    Using Gooseberries
    Gooseberries have a tart, tangy flavor that is perfect for jams, jellies, and pies. They can also be used in cocktails, sauces, and desserts. Here are a few ideas for using gooseberries:
  • Gooseberry Jam: Make a delicious and tart jam by combining gooseberries with sugar and pectin.
  • Gooseberry Pie: Create a sweet and tangy pie by filling a pastry crust with gooseberries and sugar.
  • Gooseberry Gin Fizz: Make a refreshing cocktail by combining gin, lemon juice, gooseberry syrup, and soda water.
  • Gooseberry Sauce: Serve gooseberry sauce as a topping for grilled meats or fish.
    Gooseberries are a delicious and versatile fruit that can be enjoyed in many different ways. If you’re looking for a new and exciting addition to your garden, consider growing gooseberries.